Tuesday, November 8, 2011

Recipe Challenge #7: Sour Cream & Cheese Potatoes

I decided to grill Filet Mignon for dinner tonight, so I wanted to make a recipe that would go well as a side.  The THRIVE Sour Cream & Cheese Potatoes looked like the perfect solution.

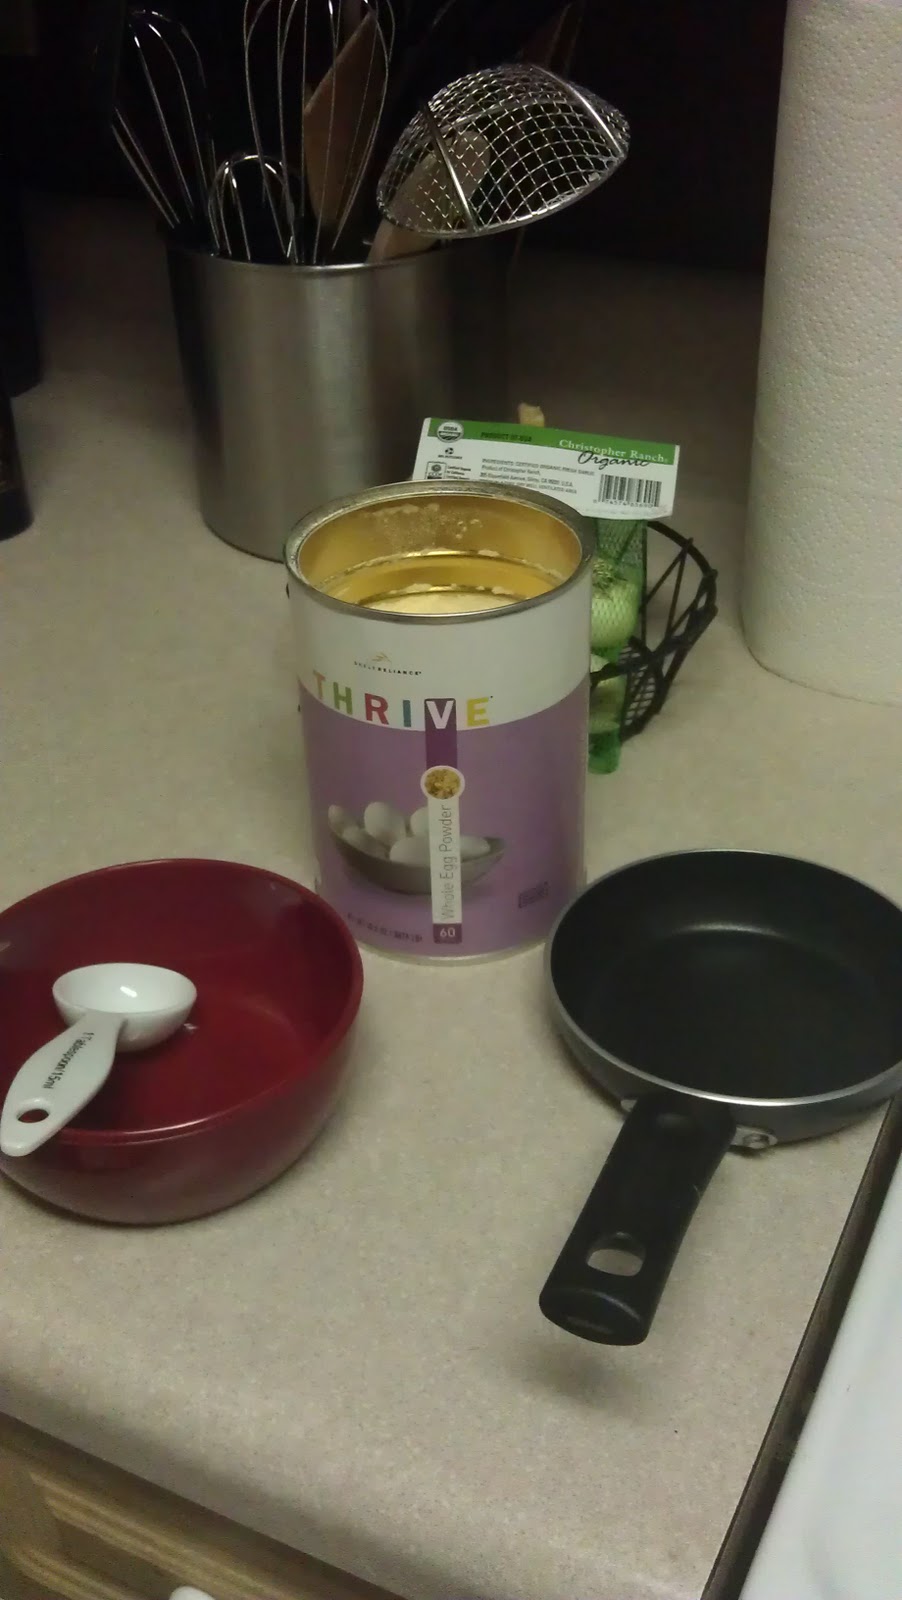
As I was making this recipe, there were a couple of things that stood out:  First, I'm SO glad that I bought 3 sets of mixing bowls.  There is no way that I could easily make most of these recipes without them.  I'm sure that is typical with most recipes, I just never cooked much before now.  

Second, the recommended soaking (i.e., rehydration) times are WAY off.  The cookbook recommended soaking the THRIVE Potato Chunks in very hot (or pour in boiling) water for 15 minutes.  Based on previous experience with rehydrating some of the THRIVE foods, I decided to add 10 more minutes to the time.  I should have added about 30 minutes. I have no doubt that the food would be perfect with the appropriate soaking time though. 

Ok, back to recipe...this one was relatively simple, just took alot of bowls & utensils.  Basically, all I had to do was soak the THRIVE Cheddar Cheese, THRIVE Potato Chunks, & THRIVE Chopped Onions in hot water until rehydrated.  Then I whipped up some THRIVE Sour Cream, which was pretty good.  I love sour cream, so I'm going to make some more and try it once it's cooled in the fridge. 

The recipe called for cream of chicken soup but I was out, so I used some cream of onion soup instead.  I didn't want to have an overwhelming onion taste, so I cut the THRIVE Chopped Onions from 1 cup to 3/4 of a cup. 

The next step was to mix the onions, sour cream, soup, 2 tbs butter & 1 1/2 c of the cheese in a sauce pan & warm it on med-high.  The cheese was sort of clumped together and there was no way I was going to be able to "top with remaining cheese", so I used the full 2 cups of the cheese in the sauce pan and then sprinkled some of my "regular" shredded cheese on top.  I know that was sort of cheating but the point of trying these recipes is to see how they work in real life, not just in an emergency situation.  It also saved me from using all of my $6.00 Whole Foods bag of shredded cheese, so I saved money by just using a small handful on top of the dish.

From there, I combined the potatoes with the mix from the sauce pan and then spread it out in a 9x9 cake pan, sprinkled with a little shredded cheese and put it in the oven at 350 degrees for about 30 minutes. 

It was really very good but more like a slightly firm potato cheese casserole than cheesy mashed potatoes, which is what I was expecting.  I think if I had let the potatoes soak a while longer, it would have turned out closer to my expectations.  I'm taking it to work tomorrow so it will "marinate" overnight in the fridge, which might soften the potatoes a bit more. 

Overall, it went very well with my steak and tomato and I plan on making the potatoes for our upcoming family dinner this weekend... I'll just be sure to start the potato soaking early.  :-)

On another note, I'm making some crockpot chili to take for lunch tomorrow and used the THRIVE Red Kidney Beans in it.  I also decided to try the THRIVE Fudge Brownies again, but this time adding an egg for a "more cake like" brownie.  I'll let you know how they turn out.

As always, stay safe & may you & yours be Blessed,
KD

Thursday, November 3, 2011

Recipe Challenge #5 & 6: Two VERY Different Recipes, One Very Entertaining Evening!

I started out the evening with the intention of only tackling one THRIVE recipe tonight, but I ended up making two recipes that are definitely polar opposites:  Beef Enchillada Bake and 6-Grain Pancakes with Blackberry Compote.  I know what you're thinking and no, we didn't eat them together.

Deciding on the Beef Enchillada Bake was an easy choice since the recipe looked really yum, I was in the mood for cheesy & beefy, and I had all the ingredients I needed to complete the dish. 

The recipe called for THRIVE Freeze Dried Ground Beef, THRIVE Corn, THRIVE Shredded Cheddar Cheese, salsa, condensed tomato soup and soft corn tortillas.  I'm not big on corn mixed with other food, so I left that out and replaced it with 1/2 cup of THRIVE Chopped Onions.

I was also about 1/4c short of the THRIVE Freeze Dried Ground Beef, so I added THRIVE Beef TPV to make up the difference.  After soaking the onion for 5 minutes and the beef & cheese in water for 15 minutes, it was time to put everything in a skillet.


It took about 7 minutes to heat everything up in the skillet and then I transferred it to the stoneware for baking at 350 degrees.  I think my oven must not bake as hot as the test kitchen at THRIVE, because I've had to add approximately 10 extra minutes to every recipe so far.  So, 25 minutes later and Voila!, dinner (well, the first one) was served.


Brandon got home just in time and was "STARVING", so I added a little sour cream, quickly took the last pic for this post (with his thumbs up) and took my first bite.

I thought it was delicious, Brandon thought it was too sweet.  While cooking in the skillet, the onions carmelized, making them sweet tasting.  I thought it was just right, especially with the side of sour cream.  Brandon suggested I use corn or rice instead of the onions, so I headed back to the kitchen to try another "batch".  I thought any leftovers would be a good comparison for work tomorrow.

This is where the 6-Grain Pancakes with Blackberry Compote came onto the scene.  Instead of a second go-around of the Beef Enchillada Bake, Brandon decided he would prefer pancakes.  I had unpacked my recent THRIVE delivery and had 2 pantry cans of THRIVE 6-Grain Pancake Mix sitting on the counter.  There was a recipe for blueberry (all I had on hand were the THRIVE Blackberries) pancakes in the THRIVE Cookbook, so I decided to accept TWO challenges in one night... I don't know what I was thinking.

I'm sure those that are gifted in the culinary arts could have whipped up the pancakes in no time and they would have been perfectly fluffy & round.  I am not one of those people.  This did not happen to me.  


The initial "whipping up" part wasn't so bad.  I mixed up the THRIVE Non Fat Milk (which actually tasted like milk - no powder taste at all!), whipped the THRIVE Eggs into perfect consistency and gently whisked the blackberries into the final mix.


Everything seemed to be going smoothly, and then I tried to cook them.  That's when things went wrong.  Of course, having a sense of humor about it made it fun, not stressful.  Brandon was there the whole time, encouraging me ("they look floppy"), helping me (laughing with me at my sad pancakes), and offering advise on the recipes ("don't use sugar in the compote, it's going to be too sweet" - I used the sugar. He was right). 


After three failed attempts, we agreed that the batter needed more THRIVE 6-Grain Pancake Mix.  I added in a little at a time, about 1/2c, until it reached a thicker consistency.
This helped alot - sort of.  We ended up with "Well Done" pancakes, the very last one turning out just right.  

Brandon was right about the compote, it was really sweet.  I put it in a jar and into the fridge.  I'm sure I'll find something to put with it, maybe with some peanut butter on toast. 

I was already full from the Beef Enchillada Bake, so I only tasted a bite of the pancakes.  I thought they were really good and so did Brandon.  He decided that next time we would try using raspberries or blueberries.  There's a recipe for THRIVE Oat Pancakes too - might have to try that.

Even with the mess-ups and huge mess the pancakes made, I wouldn't trade the laughs, the time spent and the wonderful experience with my son tonight. :-)  I am truly Blessed.

Goodnight, stay warm & safe.  Until next time,
KD

Monday, October 24, 2011

Shifting Gears a little....

I've been evaluating where I want to take this blog and what I really want to accomplish with it.  Most of my recent posts have been in reviewing products, and while I do think that reviews can be helpful for people that are trying to make a decision on whether to purchase an item or not, I feel I need to be doing more.  My desire is to truly help people become self-sufficient, save money & be prepared for any event.

I will still continue with my review of products, but I will also begin posting more "how to's and preparedness" type posts and videos on our new
YouTube Channel.  Speaking of reviews, I called Shelf Reliance (SR) customer service last week, to check on my order for the remaining items to continue my "Recipe Challenge Project".  SR is moving to a new facility, so shipping has been affected during the move and I wanted to be sure that my order from Oct 4th had not been "lost" in transition.  I was assured that it would be shipped out this week, so I hope to be back on track with the project before the end of the week.

In the meantime, I'll be posting a project on preparing to "bug out", complete with pics and video.  Also, if you get a chance, checkout
http://survivalcache.com/urban-survival/ - Excellent article!

Be back tomorrow! Stay safe & ready,
KD

Wednesday, October 12, 2011

Recipe Challenge #3 Redux: Cornbread Take 2 & a Taste Test: TPV Beef

I received an email today to let me know that Shelf Reliance is 12-14 days behind on shipments this month.  They have had a surge in orders but are working hard to keep up with all of them.  As a result, I'm still waiting on several of the THRIVE products I need to make most of the recipes in the cookbook.

I decided to give the cornbread recipe another go, just using less sugar.  I did everything exactly as before, but used half the butter and only 1/3 c of sugar.  After everything was mixed together, the consistency looked a little thin, so I added another 1/3 c of cornmeal.  This did the trick and it looked like it should.

I poured the mixture into my trusty stoneware and put it in the oven at 325 degrees.  I set the timer for 30 minutes and let it go.  After 30 minutes, the top still wasn't browned as much as I would like, so I turned the broiler on (at 500) for just 2 minutes.  The result was PERFECT. 

I let the cornbread cool for about 10 minutes and cut a piece to test.  For me, it was just right.  I think that my family would like it a little sweeter, so if this sounds like you or your family, go up to 1/2 c sugar.

My second attempt at this recipe turned out perfect in texture and taste.  It would be a wonderful addition to a chili or pot roast.


TASTE TEST: THRIVE TPV Beef
I thought I would give the THRIVE TPV Beef a quick taste test, sans additional ingredients.  I took a little nibble of it dried and it looked and tasted like large bacon bits.  The side of the can said to "soak in hot water for 10 minutes" but doesn't give the ratio of hot water to THRIVE TPV Beef.  So, I guessed at it and got it almost right.  I used 1c water to 1c THRIVE TVP Beef but probably should have used 3/4c water instead.

I let it sit for just over 10 minutes (the dryer was calling & the timer went off while I was downstairs - so more like 15 minutes).  It looked like chopped beef - the taste & texture was not.  I can't really fault the product since TPV is soy based and not real beef.  It wasn't bad, it just wasn't beef.  I'm not sure how it will do in a recipe but I'll let you know.

In the meantime, I'm going to change all of my upcoming Q Club orders from TPV to THRIVE Freeze Dried Ground Beef instead.  I am building my "Home Store" via the Q Club and intend on using the THRIVE products in place of store bought products (you'd be surprised at how much money you can save, as well as time, by doing this!).  Even though the THRIVE Freeze Dried Ground Beef is more expensive than the THRIVE TVP Beef, I only buy organic, grassfed ground beef, so I'll be saving a ton of money by using the THRIVE products instead.

Hopefully, the rest of my product will be delivered and I'll be able to move onto more complex recipes within the next week.  I'm really looking forward to trying the Mac & Cheese & Quesadilla recipes. :-)

Have a Blessed and restful night!
KD

Tuesday, October 11, 2011

Recipe Challenge #4: Scrambled Eggs

Tonight's "challenge" wasn't really a recipe but more of a taste test.  I wanted to see how the THRIVE Eggs would turn out if I scrambled them. 

Following the instructions on the side of the can, I whisked 2 tbs whole egg powder & 4 tbs water together (double recipe).  It looked fairly watery but was confident that it would turn out fine. 

I heated a small skillet and sprayed a little bit of PAM butter into the pan, then poured the mix into it.  It began to bubble and take on a pancake like consistency.  I have to admit, I was becoming less confident about the end result.

As the mixture began to thicken and brown, it started to look like fresh scrambled eggs (Thankfully! - I was REALLY not looking forward to trying them in their current state).  The THRIVE eggs take a little longer to cook than fresh eggs and it's important to keep turning them so they brown properly.  After they looked just about right, I cut up a green tomato and topped it with some hot salsa and sprinkled everything with a little sea salt & fresh ground peppercorn.

While the eggs had a very slight powdered taste to them, they were still pretty good.  I want to try again with just a little less water and maybe add some THRIVE Cheese & THRIVE Bacon to it for texture & taste.

Even though I'll be sticking with fresh eggs for breakfast for as long as I can get them, I have no doubt that in a recipe that calls for eggs, the THRIVE Whole Powdered Eggs would be just as good as fresh ones. 


Sleep well!
KD

Friday, October 7, 2011

Recipe Challenge #3: Homemade Cornbread

Update on THE CHICKEN SALAD: While it was really tasty (especially if I had some pickle relish for it) the night before, it was incredible the next day and needed nothing at all.  I took the leftovers to work for lunch and 3 others tried it.  They couldn't believe it was made with THRIVE freeze dried ingredients.  In fact, I am bringing a double recipe to work tomorrow for everyone for lunch.... It's THAT good. :-)  So, if you make the Chicken Salad Sandwich recipe, make it the night before and people will RAVE about it!

My first observation while making tonight's recipe was that I need a bigger kitchen.  AND more mixing bowls. AND a set of actual measuring spoons.  But aside from that, it was a breeze.  If you can follow directions (having the right kind of mixing bowls & measuring spoons will make it easier), then you can make this recipe.  I tend to burn bread, so I was a little apprehensive about attempting this one.  But since the other ingredients I ordered haven't been delivered yet, it was one of the few options available. 


Side Note: I know I make it sound like I am missing a huge amount of THRIVE products, but in reality, it's only a few staple items that are called for in a good deal of the recipes in the THRIVE Cookbook.  Once those arrive (I received the shipping notice today), I'll be all set for the whole book! :-)

Back to the recipe:  The only two things I substituted tonight were the salt & the sugar.  The recipe called for a cup of THRIVE sugar and a 1/2 teaspoon of THRIVE salt.  I figured sugar is sugar & table salt is table salt, so I opted not to open my cans of these two items and used my regular Publix brand of both.

Although this recipe had more ingredients than my first two recipes, it really wasn't difficult.  It called for some buttermilk, which I didn't have, so I followed the simple recipe in the cookbook for homemade buttermilk: 3 tbs THRIVE powdered milk, 1 c water, 1 tbs lemon juice and it was perfect. Be sure to mix it THOROUGHLY if you make your own.

After making my own buttermilk (which I thought was really very cool considering my lack of aptitude for cooking), I continued with the recipe as described.  After mixing everything together, I popped it in the oven for 30 minutes (max recommended time).  When the timer went off, I felt it wasn't quite as done as I would like, so I added 5 more minutes to the cook time. 

I pulled it out of the oven after a total of 35 minutes.  I thought it needed more browning on the top but I was afraid to bake it any longer than 35 minutes, so I went ahead and let the cornbread cool for about 20 minutes.  I cut a small piece to try and it was just moist enough that, with it still being warm, it almost melted in my mouth.  I thought it a bit sweet but then I'm one of those people that likes coffee black - no sugar, no cream - and unsweetened tea (a huge faux pas as a born Southerner).  Basically, most things with any noticeable amount of sugar taste a little too sweet to me. 

My son came home shortly after and I asked him to check it out for me.   He agreed that it was too sweet for cornbread - almost dessert like.  That may be why the top didn't brown as much as I thought it should.  I'm going to try again using less sugar.  Although the recipe calls for 1c sugar, I think that 1/2 c or even 1/3 c would be enough.  That should make the end result a little lighter and not near as sweet.

Bottom Line: If you like your cornbread sweet and moist, this recipe as is would be perfect for you.  If you like it a little fluffier & more bread-like, try cutting the sugar.  I'll attempt this one again and post a revised review soon.

Goodnight and have a great weekend!
KD

Thursday, October 6, 2011

Recipe Challenge #2: Chicken Salad (Sandwich)

FIRST: FOLLOW UP ON THE BROWNIES!  I was afraid that I would wake up to dry, hard brownies that crumbled when I took them out of the pan to take to work.  I am happy to report that this was not the case!  They were still perfectly chewy & moist.  Everyone that tried one commented on how great they tasted!

Ok, onto tonight's challenge:

I know I'm starting my THRIVE Recipe Challenge off with ridiculously easy recipes but there is a reason (besides the fact that I like easy recipes): I took inventory and realized that I didn't have all of the THRIVE products that I needed to complete many of the recipes without using outside resources.  So, I ordered the remaining items I needed to complete every recipe in the cookbook last night.  In the meantime, I'll have to stick with the really simple stuff.

Getting home a little later than usual tonight, an easy recipe was just what I was looking forward to "tackling".  After making it, I honestly think my 8 year old nephew could have done just as well.  It was super easy and required very little effort.

Basically, the recipe called for 3 c water, 1 1/2 c chopped THRIVE chicken, 1/2 c diced THRIVE celery, and 1/3 c of THRIVE chopped onions.  I brought everything to a boil, reduced the heat to low and let it simmer for 10 minutes.  Draining the mixture was as simple as pouring it into a strainer & then placing the strainer on top of the empty pot for 10 more minutes. 

While all of this didn't take very long at all, (just over 22 min), the recipe called for placing the mixture into the fridge "until cooled".  My thought was, "Umm, No. I'm hungry now". 

So, I sped up the process by placing it in the freezer for about 15 minutes.  This cooled the mixture enough to add in the 1/2 c Vegenaise.  We don't use mayonnaise (which is what the recipe used), so anything that calls for mayo gets Grapeseed Vegenaise instead.  It is MUCH healthier for you and we like it better than the taste of mayo.

I did a quick taste test and determined that it needed something else.  So, I added a little himalayan pink salt & ground black pepper.  While this made it almost just right, I still felt that it needed either chopped pickles or sweet relish to round it out.  Since I didn't have either of these items, I cut up some fresh tomatoes and added some tortilla chips to the dish.  If my diet wasn't sans gluten, a butter croissant would have been perfect with it.


Bottom line: I was pleasantly surprised that freeze dried chicken could be this tasty but next time I make the recipe, I'll have some pickles or relish on hand to try with it. :)

BTW, almost all Thrive products contain 100% NO GMO ingredients!

Wednesday, October 5, 2011

What is the Q-Club and how does it work?

This is a FANTASTIC way to build a 3 month - 24 month food supply for your family ON A BUDGET! If you set up a new Q shipment of at least $50 per month, via my website: http://readyoutdoors.shelfreliance.com/, I will send you a FREE Thrive Cookbook!


Recipe Challenge #1: Thrive Fudge Brownies

I left work fairly late tonight, so I wanted to make something quick & easy for my first recipe challenge.  In all fairness, this one really wasn't a challenge - even for a culinary novice like me. 

I decided on the THRIVE Desserts: Fudge Brownies.  This was just about as easy as it could get.  Just the Thrive mix, water & my oven.  The instructions said to use 1/2 c of hot water & 3 c of the brownie mix.  This took almost all of my pantry can contents.  Brownie lovers would definitely need the #10 can and at just $14.39 per can (makes 60+ brownies), it's very affordable.

The recipe said to mix the water & brownie mix for 1 minute but I used a small handheld electric mixer, so it only took about 20 seconds.  I turned the oven on and set it to 360 degrees, then let the mix "rest" for 10 minutes, per the recipe.


Ready to Bake
Although the recipe said to use a non-stick pan, I used one of my natural stone dishes and lightly sprayed it with a little Publix brand spray butter.  When the timers went off, almost at the same time, I popped the dish in the oven and set the timer for 22 minutes.

After 22 minutes, the center still looked a tad soft, so I reset the timer for another 3 minutes and then texted my son to ask him to come down for a taste test.

Baking for the full 25 minutes did the trick.  I let it cool for a couple of minutes and cut a piece.  It came right out of the dish with no sticking at all.  Brandon looked it over like it was a foreign object (yes, it looked like a brownie) and asked me "where did you get it?"  I told him it was a Thrive product as he took the first bite.  Nodding he said, "It tastes like the real thing" (yes, it is the real thing).  He commented that the texture was just right, chewy but still a really good consistency.  His rating: a big thumbs up.

Ready to Eat!
It was my turn to try it out - Now, what you have to understand is that I'm allergic to chocolate (and perfume.... it's a good thing I'm not allergic to flowers or jewelry!).  My allergy to chocolate is not in that send me to the hospital kind of way, but it does create an unpleasant allergic reaction for several days after ingesting it.

I have to admit, I considered not trying the brownies.  But after Brandon's review - and since I want to be able to give my personal opinion on the Thrive products & recipes - I decided to go ahead and have a very small piece.  It was just as Brandon described, perfectly chewy and delish.

This would make a perfect dessert to take to a party or whip up when you are in a pinch for time and ingredients.  I'm definitely going to keep a #10 can of this on hand for guests and party treats!

My first Thrive Recipe Challenge recipe was a great success and now I have a tasty treat for everyone at work tomorrow! :)  Coming up - Recipe Challenge #2: Chicken Salad Sandwich.

Tuesday, October 4, 2011

Thrive Recipe Challenge

I recently received my THRIVE COOKBOOK from Shelf Reliance.  Because I signed up as a consultant, I received some nifty pantry cans (quart sizes of all of the #10 can products) so that I could demonstrate the food at "Parties".

Now, I wasn't born a good cook.  In fact, I've been known to burn water...more than once.  So, while I was excited to receive my new cookbook and try it out, my family was very apprehensive about the whole thing.

I decided that if I was going to make a serious "go" at this business, I better learn to cook with it and actually become good at it.

So, this is my personal challenge to myself:  I'm going to make at least one recipe, if not two or three, each week and blog about my experience with it.  I figure, if I can make it work then I'll be able to show others how to make it work for them.

I'll attempt my first recipe tonight, so check back later this evening for the start of my "Thrive Recipe Challenge!"

Blessings and Sleep Well,
KD

Thursday, September 22, 2011

Aquaponics Project

We have started another project, a really cool one in our opinion, at Ready Outdoors.  It's called Hydroponics. Aquaponics (pronounced: /ˈækwəˈpÉ’nɨks/) is a sustainable food production system that combines a traditional aquaculture (raising aquatic animals such as fish, crayfish or prawns in tanks) with hydroponics (cultivating plants in water) in a symbiotic environment.    If you've never seen one, check out the link above.

We picked up our first base recently and will be working on putting it together for "show and tell".  Wayne has also discovered a really great "greenhouse" for it.  He will be making a dome shape "cap" that will act as a greenhouse for the system.  

If anyone is familiar with this, we would love some input!

Thursday, September 15, 2011

We're Back!

Hello all!  I know we have been MIA for a few months.  Life at the school (HCS) was VERY hectic over the summer months but we are getting back into a regular school year again, so we are back on the blog wagon!

I finished four, two week emergency kits over the summer & they turned out great.  Three of the kits contained the following:

Solar Kit: One Boulder 15 Solar Panel, One Escape 150 Rechargeable Power Pack w/built in Inverter

Solar Flashlight with hand crank, rechargeable battery, & AC Charger

Two weeks of Mountain House food pouches for three adults that included breakfast, lunch & dinner.

Adventure Medical First Aid Kit (these kits had the Adventure First Aid 2.0 Kit)

One ColdFire Tactical Fire Extinguisher

AMK Dental Medic (only available with complete kit)

"Sanitation/Anti-virus" Kits that included two face masks, two gloves, & hand sanitizer for two adults & two children

If you were to purchase these items separately, the cost would be $1364.00 (+ 8% tax).  We are offering this complete kit* for $1100.00 (+8% tax). That is a savings of $264.00!

If you are interested in creating your own kit, we can help you customize one and save you money!  *Kit prices can vary depending on the number of people in your household, whether you want 2 or 3 meals per day per person, and the type of solar kit you wish to purchase.  We hope to hear from you soon!

Sunday, July 10, 2011

More pics of one of the kits...

Full contents list, where to buy, suggested additional items, pictures and a video coming soon!


Tuesday, June 21, 2011

Homemade 3 Person, 2 Week Kit

I decided to put together a two week "kit" for my parents, two brothers, and my sister.  Taking into account their spouses and ages of children, enough food and supplies for 3 adults per household was appropriate.  BTW, these are intended as a "stay in place" kit, so they aren't going to be totally comprehensive.  It is assumed that certain items, like toiletries, will already be in the household.  However, they are portable in case travel is necessary.

Keeping in mind storage space limitations, I decided on the two pictured containers.  They're not terribly big and will hold everything nicely without being too heavy or overstuffed.

The clear box has 14 days of Mountain House double serving entrees for 3 adults.  I also included 14 breakfasts, two cases (6 pouches each) of veggies and a couple of apple fruit snacks.  If you've never had the Mountain House food before, not only is it very filling, it's really tasty.  The double serving pouches are enough to feed two adults very well.  Three adults will feel satisfied but not really full.

The gray box will have a Goal Zero Escape portable solar kit, 2 - 4 person Adventure Medical first aid kit, Goal Zero solar/crank/DC flashlight, batteries, small propane single-burner w/a couple of the small tanks, matches, collapsible measuring cup & small pot (to measure & heat the water for the food pouches), probably a battery powered fan, etc...  It also has wheels and latches, which I think is needed since the gray box will be the heavier of the two boxes.  The one with the food in it is light enough for me to easily lift. 

I bought both boxes at Walmart and of course, we sell all of the Mountain House, Goal Zero solar kits and Adventure Medical first aid kits at www.readyoutdoors.com.

You will also need approximately 7 - 8 cases of bottled water (for 3 adults) to store with the kit. I found the Kirkland brand for $3.75 a case (35 bottles) at Costco. 

As soon as I get everything completely put together, I'll upload a complete list, where to buy and pics of everything.

If you would like me to help you put together a similar kit, just hit me up on email, twitter or facebook and I'll be happy to help.

Have a GREAT week!
KD


Monday, June 6, 2011

Homemade Shampoo & Conditioner

Guest post today from Alexis. Enjoy.

*************

Stock up on just two ingredients—liquid soap and apple cider vinegar—so you can look camera-ready while others are fretting because they’ve run out of L’Oreal products.

In two of the recipes, you’ll use some variety of Dr. Bronner’s Magic 18-in-1 fair trade liquid castile soap.  Yes, that’s a mouthful, and some users insist that one of the 18 ways to use it is as toothpaste.  Keep that in mind when SHTF, but until then maybe stick to Crest or Tom’s of Maine.

As shampoo, body soap, and even face cleansers, Dr. Bronner’s soaps works miracles.  They’re devoid of harmful ecotoxins and potential allergens like sulfates, parabens, and PEGs.  Depending on the kind you get—there are 8 of them, including tea tree and peppermint—you get different essential oils infused in every bottle.

Oily scalp or problem skin?   Go for the tea tree or lavender types.  Both tea tree oil and lavender oil are antiseptic and helpful acne fighters and de-greasers.

Spring fever got you puffy-eyed and stopped up?  Try showering with the peppermint or eucalyptus soaps to clear your sinuses, or the citrus to wake you up in the morning.

Dry skin?  Try the almond and rose soaps for extra moisture.

Super sensitive to any and all chemicals and smells?  The baby mild variety contains only the basic ingredients: water, organic coconut oil, potassium hydroxide (which isn’t actually in the final product), organic olive oil, organic hemp oil, organic jojoba oil, citric acid, and tocopherol (for preservation).

DIY Shampoo and Face/Body Wash

1 ½ cup water
1 ½ cup Dr. Bronner’s liquid castile soap
Optional ¼ cup aloe vera gel and 3 drops of essential oil of choice
Mix the ingredients in a bottle.  Dip your head upside down and apply directly to scalp, not hair.  It’s watery, so using it standing up risks having it running into your eyes (no thanks).  Lather, massage, and wash out.  Follow with the DIY hair conditioner.

In the unlikely event you find this mixture too drying, add the aloe vera gel and essential oil

DIY Hair Conditioner & Facial Toner

1 ½ cup water
1 ½ cup apple cider vinegar
Apple cider vinegar balances your skin and scalp’s pH, making it less likely to be oily or dry even hours after cleansing.  As a conditioner, apply this mixture to scalp (like the shampoo) and work out tangles.  Rinse with water.  As a facial toner, splash onto face with clean hands or apply with cotton balls.  Follow with gentle moisturizer.

Bio: Alexis Bonari is a freelance writer and researcher for College Scholarships, where recently she’s been researching scholarships for veterans and scholarships from banks. In her spare time, she enjoys square-foot gardening, swimming, and avoiding her laptop.

Friday, April 15, 2011

It's ALIVE!!


Our "Commerce Cafe" is up running now!  You can now order our products online.  We are offering free delivery to Alabaster, Hoover, Pelham, and Vestavia, AL.  Pick up is also available in Pelham, AL.

Check it out today!  https://readyoutdoors.mycafecommerce.com/

Sunday, April 3, 2011

Friday, March 18, 2011

Nuclear Fallout in Japan = U.S. Supply of IOSAT Sold Out.....

If you've been following the news lately, then you know that there has been a run on Potassium Iodide, the most popular brand being IOSAT.  But why?  Does is really help protect you from the fallout of radiation?  Should you bribe your prepper neighbor for half their supply?

Check out this great article from Scientific American.  It details why it may be useful for some as well as the negative aspects of using Potassium Iodide.  Great history lesson too!

SPOILER ALERT! If you are over 40 years age, save your money and buy something that you can really use (like a couple of Mountain House Meals or an Adventure Medical Kit from us!) :-)

Until next time.... have a SAFE and productive weekend!

Saturday, February 26, 2011

DIY – How to Make Your Own MREs At Home

REPOST - Thanks to "Jarhead Survivor" for this great idea!  I'm going to try my hand at this next week and will post my results!

This topic is hardly new among survivalists and campers, but when I sat down the other day to make some MRE’s for summer camping I thought I’d take a few pictures and share with you how I make mine.   I’m going to put a few of these in my bug-out-bag too, because at the moment I’ve just got some loose food items floating around in there and this method will help keep my pack organized.

For those of you who may not know MREs are handed out in the military and stands for Meal Ready to Eat.  Military MREs come with many different entrees and you can make yours the same way.  You’re limited only by your imagination.

The ones I put together here are pretty basic, but should give you a good idea of how to go about making your own.  To keep things neat and help them stay fresh for a long time I vacuum seal mine.  Some people will calculate the amount of calories for each meal and figure out exactly what they’re getting for protein, carbs, etc.  I don’t get that precise with my meals although it’s not a bad idea if you’re trying to figure out how much you should take on an extended trip.

For this set I used protein bars, crackers, Ramen Noodles, trail mix bars, fruit cups, coffee singles (2 per MRE), and I also put in a spoon, matches and a few paper towels to use as toilet paper or whatever.

Step 1 is to assemble the items you’d like to put in your MRE.  (Below)
CIMG3799
Below you can see the device I use to vacuum pack my MREs.  This is a Seal a Meal that I bought at Target in the $60 range, if I remember correctly.
CIMG3800
The bags I use are the continuous feed kind, so you have to seal one end first.  (Below)  You can buy individual bags too, but I vacuum seal meat and other things to freeze and like to have this kind of bag so that I don’t waste any more than I have to.
CIMG3802
Put the end of the bag in the sealer (above), close the lid and hold it down until the “Sealing” light comes on and then turns off.  (Below.)  This becomes the bottom of the bag.
CIMG3804
Next , put the items you want on top of the bag to measure how much you need to cut.  (Below.)
CIMG3805
Put everything in the bag neatly.  Now put the end of the bag in the sealer and close the lid.  The vacuum sealer starts up and starts sucking the air out of the bag.
CIMG3806
Below you can see the air starting to get sucked out.
CIMG3808
Now you can see all the air finally removed from the meal.
CIMG3810
Once  you have everything assembled it literally just takes minutes to prepare a bunch of meals for later use.
CIMG3815
The last thing I do is put a date on the package so I’ll know what date they were prepared on.  I usually give them a two year expiration although I’m pretty sure they’d be good for a long time after that.

Other ideas I’ve had for these were to put in tuna packs and a single serving of mayo, plus nuts, prepackaged rice meals, a single serving of Gatorade or something along those lines.  I’ve also taken nuts and/or GORP and divided them out into baggies and put those in the meal.  I figured with the air removed they’d stay fresh for a long time even after they’ve been removed from the original packaging.

In my post about the Coffee Can Survival Kit I got some terrific feedback from you readers, so I thought I’d push my luck and see what you would put in your MREs.  Be creative, but keep in mind you’ll have to carry these meals when you’re hiking or bugging out, so you’ll want to keep them somewhat light.  In the pictures above you’ll see some canned stuff, which I don’t often do because they add a little extra weight.

So here’s my question:  What would you put in your MREs?
-Jarhead Survivor